META: Preserve the taste of history! Your comprehensive guide to successfully saving and storing heirloom tomato seeds for next season.
The Keeper’s Guide: Saving Your Heirloom Tomato Seeds for the Next Generation
(A Letter from the Garden & Greenhouse Editorial Team)
If you are like us, you don’t just garden; you participate in a dialogue with history. When we plant a packet of seeds, especially those rare, deeply storied heirloom varieties, we are doing more than just coaxing life from the earth. We are becoming caretakers of a culinary archive.
And that is why the process of saving seeds—the craft of the true gardener—is so vital.
For those of you who have been sowing and harvesting beautiful, unique tomatoes, this guide is for you. Whether you’ve managed a few small salvaging batches or you’re ready to elevate your seed-saving game to a true art form, we’ve compiled everything you need to know.
By the time we’re done, you will understand not just how to save your seeds, but why this act of seed saving is one of the most profound, satisfying, and genuinely revolutionary practices a home gardener can engage in.
Let’s get started.
🌿 Section 1: Why Seed Saving Matters More Than Ever
Before we discuss the practical steps, we must address the ‘why.’ Why is this meticulous process worth the labor? Because what you are saving is far more than just viable plant material.
The Flavor Archive: A Taste of Provenance
Think about the difference between a mass-produced supermarket tomato and a deeply storied Cherokee Purple, or a smoky, beefy Brandywine. The flavor difference is staggering, and it’s genetic. By saving seeds, you are literally capturing the unique genetic signature—the flavor profile, the size, the texture—of the specific plant that thrived in your microclimate during a specific year. You are building The Flavor Archive.
This is critical knowledge, and it ties directly into heritage gardening. When we pass these seeds down, we are keeping certain flavors and resilience traits alive that would otherwise vanish in the vast, homogenized global seed trade.
Seed Sovereignty: Tending to Your Own Future
In a world increasingly dominated by commercial monocultures and patented seeds (the modern F1 hybrid), the ability to start your garden from seeds you saved is an act of deep agricultural self-reliance. It’s an act of seed sovereignty.
It means that the destiny of your garden—its specific character, its historical flavor, its unique resilience to local pests—rests in your own hands, guided by practices passed down through millennia of farming knowledge.
🌟 A Personal Insight: I remember years ago, I was working with an older gardener who grew a specific, rare type of yellow tomato. She explained that her seeds weren’t just seeds; they were “our family’s insurance.” They represented the knowledge of her grandmother, who had grown it in the exact spot, using the exact soil, decades ago. That’s the intangible value we are preserving.
🧑🔬 Section 2: Preparation—Know Your Varieties
Not all seeds are created equal. This is perhaps the most critical conceptual step.
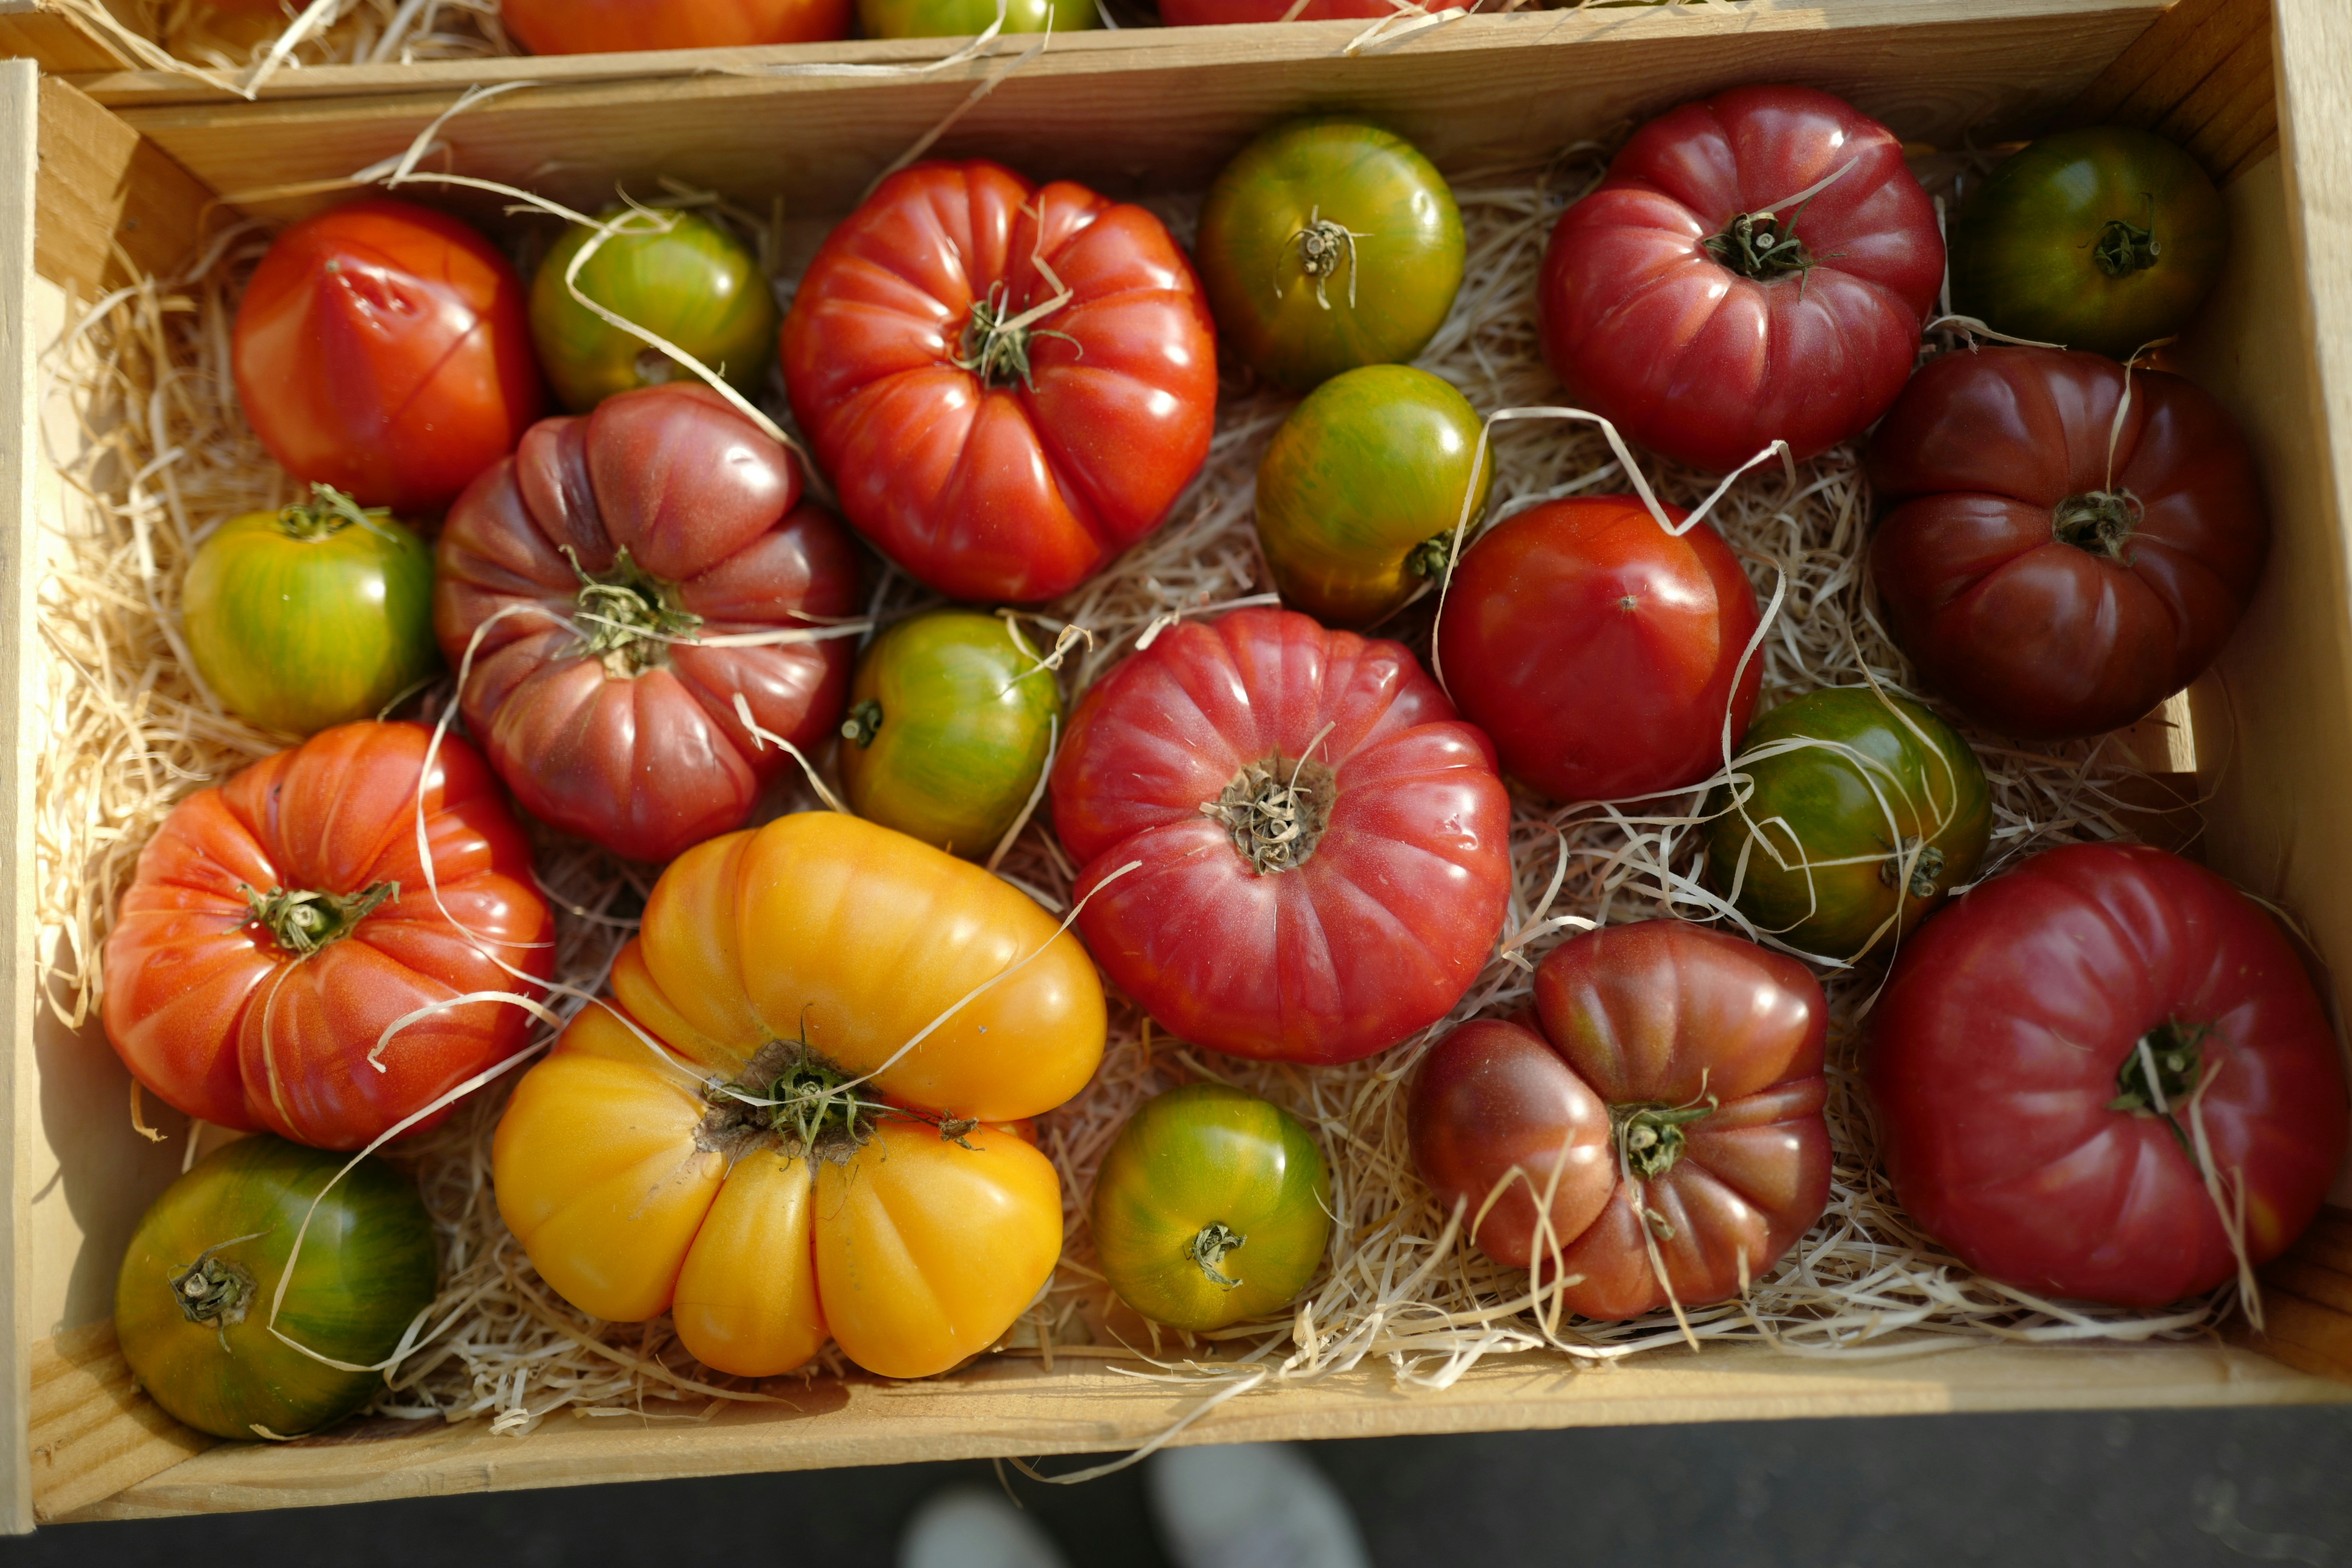
The Heirloom Advantage: When you save seeds from open-pollinated heirlooms (like ‘Mortgage Lifter’ or ‘Black Krim’), you are saving the true, stable genetic line. These varieties are genetically complex and diverse, and they can reliably self-sow and produce stable seeds year after year.
The Warning (The F1 Myth): Please exercise extreme caution with modern hybrid varieties, often labeled ‘F1.’ These are cross-bred for specific commercial traits (like extreme uniform size or shelf life). While they perform beautifully in the garden, they are often engineered so that the genes are intentionally blended, meaning the seeds saved from them usually won’t grow into the exact plant you saw.
Our golden rule? If it’s a famous, centuries-old name—an open-pollinated heirloom—save it. If it’s a fancy name and a cross-section of modern science, maybe save the photo, but don’t save the seed.
🥭 Section 3: Step-by-Step Guide: The Harvest
Success begins at the vine. We need optimal seed set, which means letting nature do its work.
🔴 Step 1: Waiting for Peak Ripeness (Rhizomatous Drying)
This step cannot be rushed. Tomatoes must be allowed to mature fully, and ideally, allowed to dry slightly on the plant.
Wait until the tomatoes are at their absolute peak of ripeness, but look for those that are lowest-hanging or slightly past their prime. These are the most likely to have reached their prime maturity.
When you harvest, the seed pods (the capsules) should feel papery, dry, and relatively brittle to the touch—not soft, squishy, or fleshy. If they are still damp, the germination rates will plummet, and mold becomes a serious risk.
🔴 Step 2: Initial Collection and Separation
Gently collect the ripe fruits and allow them to cure or dry slightly indoors for a few days. This stabilizes the pulp.
When you see the pods begin to split open, the seeds inside will be visible. Use a small, fine brush, or gently rinse the pods in a shallow dish of lukewarm water. The water will help separate the viable, creamy-white seeds from the surrounding gel and fibrous pulp.
Practical Tip: Don’t scrub the seeds! Gentle rinsing is enough. Over-washing can damage the delicate seed coat.
🔴 Step 3: The Seed Bath (Cleaning the Residue)
Transfer the seeds to a shallow dish. Let them soak for an hour or two in a solution of warm, non-chlorinated water mixed with a pinch of mild, natural detergent (like Castile soap).
This bath helps lift the sticky, nutrient-rich pulp that sticks to the seeds. Strain the seeds through cheesecloth and gently rinse them under cool running water, ensuring they are thoroughly cleaned of all excess membranes and pulp.
🌞 Section 4: Drying and Curing (The Moisture Management)
This is, frankly, the single most critical phase. Improper drying is the number one cause of seed failure. Seeds must be bone-dry to survive long-term storage.
💧 Step 1: Initial Air Drying
Spread the cleaned seeds in a single, even layer on shallow, breathable trays (like a cookie sheet lined with cheesecloth). Place these trays in a very dry, warm, and well-ventilated area, away from direct sunlight.
We are aiming to pull all the moisture out of the seeds. This might take anywhere from one to three weeks, depending on the humidity of your climate. The seeds will transition from being damp-looking to feeling light and airy—they should be completely desiccant.
💧 Step 2: Viability Testing (The Confidence Check)
Before declaring your batch “archived,” we need to know it will work!
Once the seeds are thoroughly air-dried, take about 10–15 seeds and perform a simple test. Plant them in damp, potting soil and keep them in a protected spot. Monitor them closely for several weeks. If they germinate reliably and grow into healthy seedlings, you can be confident in the batch. If they struggle, they likely weren’t fully dried.
❄️ Step 3: Long-Term Storage
Once you have validated your dry, viable batch, it’s time to store them for the deep sleep.
- The Container: Use small, clear, airtight glass jars. Glass is inert and doesn’t leach materials into the seeds.
- The Labeling: Do not skip this. Immediately label the jar with:
- The Variety Name (e.g., Brandywine)
- The Year Harvested (e.g., 2023)
- The Location/Source (e.g., Front Garden, Austin, TX)
- The Environment: Fill the jars, leaving a little air space. Before sealing, add a commercial desiccant packet (like silica gel). These little packets absorb ambient humidity, keeping the seeds stable for years.
- The Deep Freeze: Store the labeled, sealed jars in a cool, dark, stable environment—a deep freezer is ideal. Low temperature slows down the decay process dramatically.
💡 Section 5: Pitfalls & Practical Wisdom (What to Avoid)
We’ve seen generations of gardeners fail at this process. We’ve learned from their mistakes so you don’t have to!
🛑 1. The Moisture Mismanagement Trap
As mentioned, this is the biggest error. “Dry-feeling” is not the same as “Bone-dry.” If there is residual dampness, mold will bloom rapidly, or the seeds will spoil before you even find them in the freezer. The seeds must be light, brittle, and dry to the touch.
🛑 2. The “Over-Pampering” Myth
Do not save seeds from plants that received highly unusual chemical boost or extreme, unnatural care in the immediate past. Save seeds from plants that grew in your garden’s natural cycle, responding to the local elements—the true reflection of your heritage garden.
🛑 3. The Mixing Mix-Up
Cross-contamination is devastating to a collection. If you harvest three different heirlooms, process them, and store them in the same spot, label everything immediately. Never let the varieties mingle.
A Word on Wisdom: Seed saving is not a science you pass a test on; it’s a patience exercise. Embrace the time it takes. The careful handling of each batch is a ritual that grounds you in the cycle of nature.
💚 Conclusion: Your Legacy in a Jar
Saving seeds is far more than a simple gardening hack; it is a connection to the ancient rhythm of harvest, preparation, and generational continuity.
When you are ready to plant your newly saved seeds next season, you are doing more than just planting tomatoes. You are planting a piece of your family’s history, ensuring that the unique flavor profile of your garden—the character that makes it yours—persists.
Take pride in this knowledge. You are now a keeper of seeds, a vital link in the great chain of agricultural wisdom.
Your Call-to-Action: As you finish your current harvest, treat those little seeds like gold. Dedicate an hour to the cleaning, drying, and labeling process today. The seeds you save this year will be the seeds that bring forth the magic you crave next spring. Happy preserving!
INTERNAL: Guide to companion planting for robust tomatoes INTERNAL: How to select and store the perfect container garden soil mix